
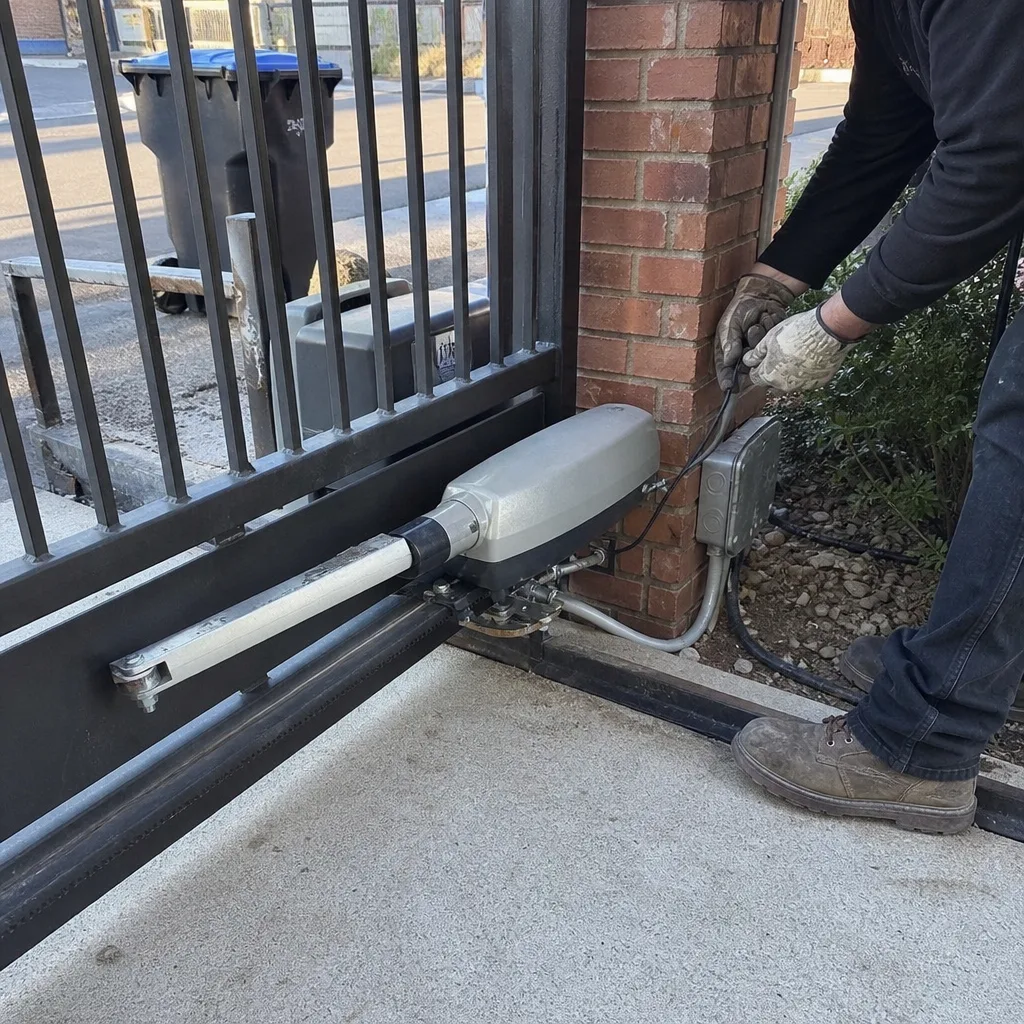
Last updated November 15, 2026
 Wrought iron
 Wood & steel frame
 Farm & ranch
 Sliding driveway gates
 LiftMaster operators
Free on-site gate assessment - hinges, posts, and your LiftMaster or Nice gate operator checked before anything is quoted
The assessment is free and the quote is the invoice.
Get your free estimateDIY vs Professional Gate Repair: The Spring Valley Homeowner’s Decision Guide
Adjusting a gate’s limit switch is a legitimate DIY task. Adjusting the spring tension on a high-tension torsion system is not, and the difference between the two isn’t obvious until something goes wrong at 200 pounds of stored force. That gap is where most homeowners get into trouble: they treat “gate repair” as one mental category when it’s really three. Some fixes are genuinely low-risk and well within reach if you own the right tools. Some are doable but carry warranty and code consequences you should know about before you touch anything. And some can injure you or someone else, or leave a motorized system out of legal compliance. This guide gives you a clear task-by-task framework for sorting a Spring Valley repair into the right category, so you can decide with facts instead of guesswork.
Quick Answer
Most gate repairs fall into one of three categories: low-risk tasks you can safely handle yourself (cleaning tracks, adjusting a limit switch, replacing a battery), borderline tasks that are doable but carry warranty or compliance risk (replacing sensors, resetting a control board), and professional-only work involving springs, high-voltage wiring, and heavy gate panels. If your gate uses a torsion or high-tension spring, or if it involves 120-volt power, hire a professional. Everything else, you can evaluate case by case using the breakdown below.
Styles & brands we work with
- Wrought iron
- Wood & steel frame
- Farm & ranch
- Sliding driveway gates
- LiftMaster operators
Table of Contents
- How a Gate System Actually Works
- The Task-by-Task Breakdown: DIY-Safe, DIY-Risky, Professional-Only
- What DIY Gate Repair Really Takes
- Nevada Liability Exposure: DIY vs Professionally Serviced
- UL 325, Code Compliance, and Your Insurance
- The Smart Middle Path: Partial DIY with a Targeted Inspection
- Brand Matters: Why Some Gates Are Easier to DIY Than Others
- When DIY Stops Making Sense
How a Gate System Actually Works
A gate is not one machine. It’s a mechanical structure, a drive system, a control system, and a safety system layered together. Understanding which layer your problem lives in is the first step toward deciding who should fix it.
The mechanical layer includes the gate panel, the hinges or track and rollers, the posts, and any counterbalance hardware. On a swing gate, this is hinges, stops, and latches. On a sliding gate, it’s the track, the guide rollers, and the end stops. On some heavier systems, a counterbalance spring helps offset the weight of the panel.
The drive layer is the operator: the motor and gearbox that actually moves the gate. Residential operators like Mighty Mule or LiftMaster are built around lighter panels. Commercial operators from FAAC or BFT are built for heavier, higher-cycle use. The operator’s capacity has to match the weight and length of the gate, or it will fail early.
The control layer is the board, the receiver, the remote, the keypad, and any access-control hardware. This is where most “my gate stopped working” calls actually start, and it’s also where a lot of DIY attempts go wrong in ways that are hard to trace.
The safety layer is what makes an automated gate legal to operate. Photoelectric sensors, edge sensors, and monitored safety devices all sit here. In Spring Valley, where HOA and multi-unit properties often have automated gates meeting the street, this layer gets more attention than it does on a rural property, because more people walk, bike, and drive through a moving gate every day.
When you call a repair, the first question a real gate specialist asks isn’t “what brand is it” – it’s “which layer is failing.” That’s the same question you should ask yourself before deciding whether to DIY.
The Task-by-Task Breakdown: DIY-Safe, DIY-Risky, Professional-Only
Here’s the framework. Each task is rated by risk to you, risk to the equipment, and risk of voiding a warranty or creating a liability problem. Read it as a sorting tool, not a to-do list.
DIY-Safe tasks are those where a mistake means a gate that doesn’t work, not a gate that hurts someone or an operator that’s now out of code.
- Cleaning the track and rollers. Debris in the track is one of the most common causes of a sliding gate that drags or stops. A stiff brush and a shop vac handle it.
- Lubricating hinges, rollers, and pivot points. Use a lubricant rated for outdoor hardware and apply sparingly. Over-lubricating attracts dust, which is a real issue in Spring Valley.
- Adjusting a limit switch on the operator. The limit switch tells the motor where to stop. If your gate overshoots or stops short and the manual documents the procedure, this is a legitimate homeowner task. Always disconnect power before adjusting.
- Replacing a remote battery or re-pairing a remote. The manual walks you through it, and if you get it wrong, nothing dangerous happens.
- Clearing obstructions and checking sensor alignment by eye. If the gate reverses unexpectedly, look for a leaf, cobweb, or shifted sensor before you call anyone.
- Tightening visible bolts and hinge screws. Loose hardware causes sag, and sag causes bigger problems. A socket set and a few minutes fix most of it.
DIY-Risky tasks are doable but carry consequences. You can physically perform them – the question is whether you should.
- Replacing or realigning photoelectric sensors. It sounds simple, but a sensor mounted at the wrong height or angle fails intermittently, and intermittent safety failures are the hardest kind to diagnose.
- Replacing the control board or receiver. If you use the wrong replacement part, the operator may run but the safety features may not engage properly. That’s a code problem even if the gate “works.”
- Resetting or reprogramming the operator after a power event. Most boards recover fine, but some need a specific sequence, and a half-completed reset can leave the safety reverse disabled.
- Tightening a visibly loose spring. This one belongs in the professional category the moment the spring is under real tension. If you’re not sure how much tension is stored in the assembly, don’t touch it.
Professional-only tasks are the ones where the consequences of getting it wrong are physical injury, property damage, or a code violation.
- Replacing or adjusting torsion and high-tension springs. These store enormous force. A spring that lets go during a homeowner repair can break bones or worse. Trained technicians use the correct winding bars and follow torque procedures for a reason.
- Any work on 120-volt power wiring to the operator. If the problem is upstream of the low-voltage control side, it’s an electrical job. This is where we tell every homeowner the same thing: stop and call.
- Replacing or re-hanging a heavy gate panel. A sliding or swing panel can weigh several hundred pounds. Dropping one damages property and can injure anyone nearby.
- Replacing a failed operator motor or gearbox. The mechanical fit, torque setting, and safety re-commissioning all have to be done correctly.
- Any repair that alters the safety reverse system. If your fix touches the sensors, the edge, or the force settings, it needs to be verified properly after the repair. A pro will test it. A homeowner usually won’t.
Here’s how we sort it when a Spring Valley homeowner calls and describes a problem. If the answer is “the track is dirty” or “the remote needs a battery,” we say so, and we mean it. If the answer involves a spring, a motor, or line voltage, we send a technician.
What DIY Gate Repair Really Takes
Honest assessment: most DIY-safe gate tasks need less tooling than people expect. The professional-only ones need far more than people realize. It’s the middle category where the tool requirement gets interesting.
For the DIY-safe tasks, here’s what you actually need on hand:
- A socket and wrench set. Standard and metric. Gate hardware is a mix, and you don’t want to round off a bolt because you grabbed the wrong size.
- A screwdriver set, including a small flathead for prying sensor covers. Most operator boards and terminals are held together with small screws.
- A multimeter. If you’re going to touch anything electrical, even on the low-voltage side, you need to be able to check for continuity and confirm power is off. A cheap multimeter is fine; the discipline of using it is not optional.
- A shop vac and a stiff brush. Sliding gate tracks collect debris, and half of “my gate is broken” calls turn out to be a track problem.
- Outdoor-rated lubricant. Not WD-40 as a lubricant; a proper grease or dry lubricant designed for gate hardware.
- The operator manual for your specific brand. If you don’t have it, download it before you touch anything. Mighty Mule and LiftMaster both publish their manuals, and the limit switch and remote pairing procedures are documented there.
- A helper. Not a tool, but it belongs here. Anything involving a moving gate and a person standing near it is safer with a second set of eyes.
What DIY gate repair does not require, and where people overestimate their readiness: specialized spring winding tools, torque calibration equipment, safety reverse testing gear, or the ability to read a wiring diagram and know which terminals are safe. If a task needs any of those, it belongs to the professional side.
The other honest requirement is patience. A limit switch adjustment is easy when it works on the first try. When it doesn’t, you’re into a diagnostic loop that can burn an afternoon and leave you with a gate that’s worse off than when you started. Our technicians have up to 11 years of experience with exactly these diagnostics; a homeowner with a Saturday afternoon doesn’t need to match that, but you should be clear-eyed that a “simple” adjustment sometimes isn’t.
Nevada Liability Exposure: DIY vs Professionally Serviced
Here’s the part of the DIY conversation most guides skip. If your gate injures a visitor, a delivery driver, or a child who wandered onto the property, the question of who repaired it last becomes very relevant. Nevada premises liability law holds property owners responsible for maintaining reasonably safe conditions, and a gate is part of that responsibility.
The core difference between a DIY repair and a professionally serviced one comes down to documentation and defensibility.
- Documentation. When a licensed company services your gate, there’s a record of what was checked, what was replaced, and when. That record matters if a claim is ever made. A homeowner’s DIY repair has no paper trail beyond a receipt for a part.
- Standard of care. A court or insurer will ask whether your gate met the standard of care for an automated gate in the same setting. A gate serviced by a specialist who verifies the safety reverse and sensor function is more likely to meet that standard than one repaired without those checks.
- Insurance. Your homeowner policy typically covers your liability, but a repair that a technician would have flagged as unsafe is a different situation from one that was professionally serviced. Some policies also contain exclusions or conditions around unpermitted electrical work, which matters if the DIY repair touched the operator’s power supply.
- HOA and multi-unit properties. If you manage or own a Spring Valley property with an HOA or shared access gate, the standard is higher. A shared gate that’s been repaired without safety verification exposes every property on that access lane.
This is not a scare tactic, and it’s not a reason to call a professional for a dirty track. It’s a reason to categorize carefully. A DIY-safe task performed well is no more risky than a professional task performed well. A borderline task performed by a homeowner who doesn’t know what they don’t know is where the exposure lives.
The practical rule we give homeowners: if the repair could affect whether the safety reverse engages when someone is in the gate’s path, either get it verified by a professional or don’t do it yourself. That single test sorts most of the borderline work correctly.
UL 325, Code Compliance, and Your Insurance
UL 325 is the safety standard for automated gate operators in the US. It’s what makes an automated gate legal to operate, and it’s what most homeowners have never heard of until something goes wrong. Here’s the short version that matters for a DYI decision.
UL 325 requires automated gates to have safety features that prevent entrapment. On a residential system, that includes photoelectric sensors and often an edge sensor, plus a safety reverse function. On commercial and multi-unit properties, the requirements are stricter, including monitored safety devices and specific placement rules. When a gate is repaired in a way that leaves the safety features non-functional, the gate is out of compliance even if it opens and closes.
Which DIY repairs can void UL 325 compliance on an automated system?
- Removing or bypassing a safety sensor because it kept falsely triggering. This is the most common one, and it’s the most dangerous. If a sensor is failing, it needs to be fixed or replaced, not disconnected.
- Installing a replacement sensor at the wrong height or angle. A sensor that only detects some of the time is a compliance problem.
- Replacing a control board with an unlisted or mismatched part. The board controls the safety logic. A board that wasn’t designed for your operator may not run the safety reverse test on startup.
- Changing force or reverse sensitivity settings to keep the gate from stopping so much. This is exactly the wrong fix, and it’s a UL 325 problem.
- Adding a new remote or access device that circumvents the safety reversal.
What this means for insurance claims: if a gate injures someone and the insurer determines the safety devices were bypassed or improperly repaired, they may deny the claim or reduce the payout. That’s a general insurance principle, not a promise about your specific policy, but it’s the reason we tell people to be cautious with anything in the safety layer.
In Spring Valley, where automated gates at HOAs and multi-unit properties frequently face walkers and bicyclists, this isn’t theoretical. A gate that reverses on contact with a car is one thing. A gate that reverses on contact with a person is a different standard, and UL 325 is written with the second case in mind.
The Smart Middle Path: Partial DIY with a Targeted Inspection
The best value for most homeowners is neither full DIY nor full professional service. It’s a hybrid: you handle the low-risk tasks yourself, and you bring in a specialist for a targeted inspection of the parts you can’t safely assess. This gives you the real savings of DIY without taking on the hidden risk.
Here’s how we’d structure that, step by step.
- Do a full walkaround and write down what you observe. Note every symptom: does the gate drag, reverse unexpectedly, stop in the middle, beep, flash a light code, or refuse to move at all? Write it down before you touch anything, so you have a baseline.
- Handle the DIY-safe tasks first. Clean the track, lubricate the hardware, tighten visible bolts, check the sensors for obstructions, replace the remote battery. Many “gate repair” calls resolve at this step.
- If the gate is still misbehaving, stop and book a targeted inspection. Not a full repair call – a diagnostic visit. Tell the technician what you observed and what you already tried. A good gate specialist will spend the visit on the parts you can’t safely handle: the springs, the operator internals, the wiring, and the safety reverse test.
- Get the inspection findings in writing. Ask what’s within DIY reach, what isn’t, and what needs to be fixed now versus watched. That document is worth keeping for the liability reasons above.
- Do the follow-up DIY work yourself if it’s genuinely safe. Cleaning a track, replacing a battery, adjusting a limit switch documented in the manual – all fair game after the inspection has ruled out the bigger issues.
- Book professional service for anything in the safety layer or involving line voltage. That’s the part of the hybrid model you don’t DIY.
This approach also fits how we work. Our electric gate repair service is built around diagnostics, and when the issue is a spring or a heavy operator, technicians who have up to 11 years of experience on gate systems specifically (not garage doors, not general handyman work) can tell you in one visit whether what you’re looking at is a maintenance item or a real repair.
Brand Matters: Why Some Gates Are Easier to DIY Than Others
Not all gate brands are equally DIY-friendly. Some are designed with homeowner serviceability in mind, and others are engineered for installer-level access only. Knowing which one you have saves a lot of wasted effort.
The residential-leaning brands tend to be more DIY-friendly. Mighty Mule publishes detailed homeowner manuals, and its operators are commonly found on residential driveways where a homeowner is expected to do basic maintenance. LiftMaster also publishes thorough documentation, and limit switch and remote pairing procedures are within reach for most homeowners who can follow a manual.
The commercial-leaning brands are a different story. FAAC operators are frequently used on heavier, higher-cycle gates, and their service procedures assume a technician with diagnostic equipment. BFT is similar – built for commercial and multi-unit access, with control logic that’s not designed for a homeowner to reprogram by trial and error. Attempting to DIY a commercial operator is where we most often see a small problem turn into a bigger one.
The good news is that you don’t have to guess. A diagnostic visit from a specialist who works on your brand will tell you which parts of your system are within homeowner reach and which are not. We work on all nine major brands – LiftMaster, FAAC, BFT, Linear, Viking, Ghost Controls, DoorKing, Elite, and Mighty Mule – and the brand on your gate tells us a lot about how the system was built and what a reasonable DIY boundary is.
If you’re not sure what you have, look for the nameplate on the operator housing. That label determines everything about which manual to consult, which parts to order, and whether DIY is realistic. Reading the label is step one in any gate repair decision in Spring Valley.
When DIY Stops Making Sense
There are clear signals that it’s time to call. If a spring is broken, sagging, or making a bang when the gate moves, call. If the operator is tripping a breaker or the wiring looks damaged, call. If the gate reversed on a person or a pet and you can’t identify why, call before you use the gate again. If the operator’s manual doesn’t document the fix you’re considering, call. And if you’ve spent more than an hour diagnosing a single symptom, the honest answer is that you’ve reached the end of productive DIY time.
The category boundary matters here too. Anything that affects the safety reverse, the springs, the line voltage, or the mechanical fit of a heavy panel is not a homeowner repair. Everything else, we’re happy to walk you through over the phone so you can decide for yourself.
Common Mistakes to Avoid
- Treating all gate repairs as one category. The most common mistake is deciding “I’ll DIY it” or “I’ll call someone” before sorting the problem. Read the task, categorize it, then decide.
- Bypassing a sensor that keeps triggering. A sensor that’s “too sensitive” is usually a sensor that’s dirty, misaligned, or failing. Disconnecting it removes a safety device and puts you out of UL 325 compliance.
- Adjusting spring tension without the right tools or training. Torsion and high-tension springs store serious force. This one is professional-only, no exceptions.
- Ordering a replacement control board without matching the model number exactly. Boards look similar across models but the safety logic differs. A board that runs the motor but doesn’t run the safety reverse on startup is a hazard.
- Skipping the test after a repair. Any repair should end with the safety reverse test: put an obstruction in the gate’s path and confirm it reverses. Skipping this step is how a “fixed” gate becomes an unsafe one.
- Assuming Spring Valley dust and debris won’t affect the track. Debris buildup in the track of a sliding gate is a constant in this climate. Half of what feels like a motor problem is a track that hasn’t been cleaned in months.
- Repairing a shared-access gate without notifying other owners or the HOA. A shared gate serviced without documentation exposes everyone on the access lane. Loop in the other parties before you touch it.
See the difference
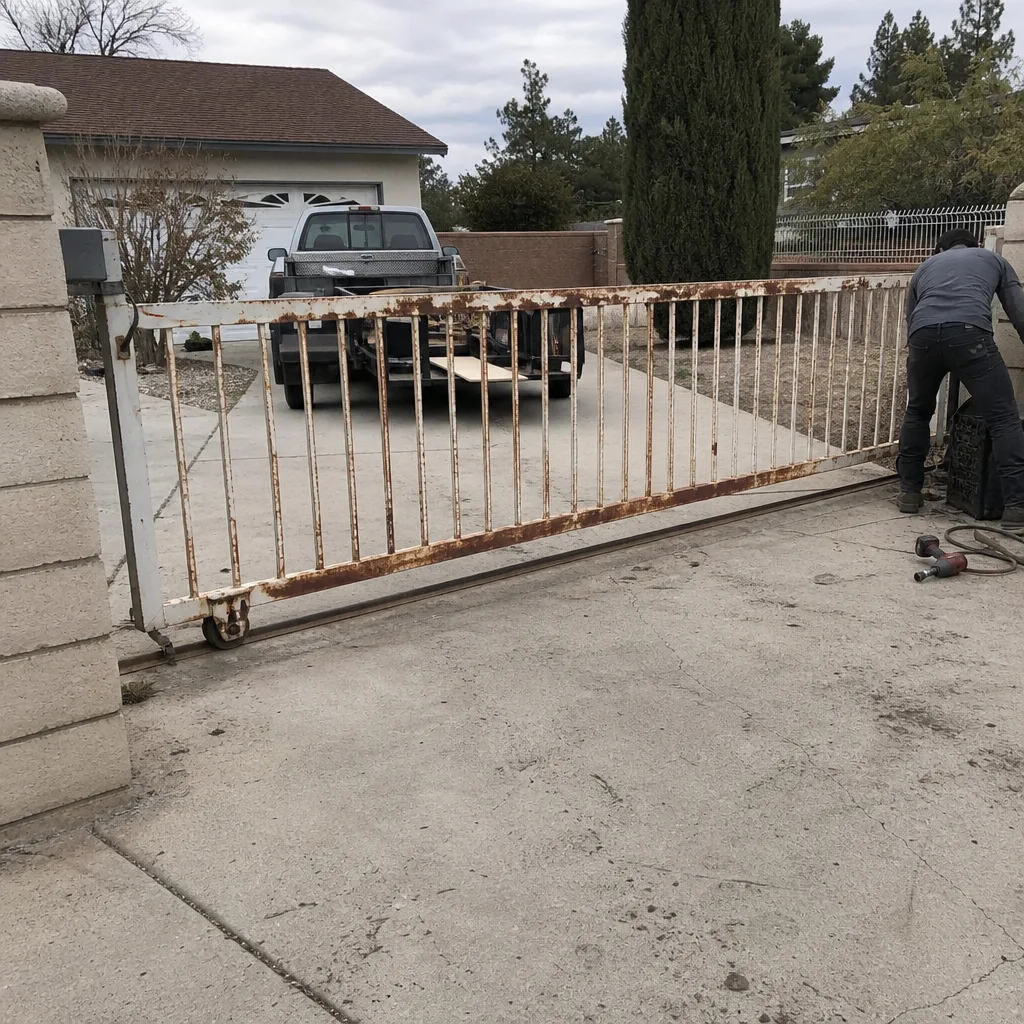 Before
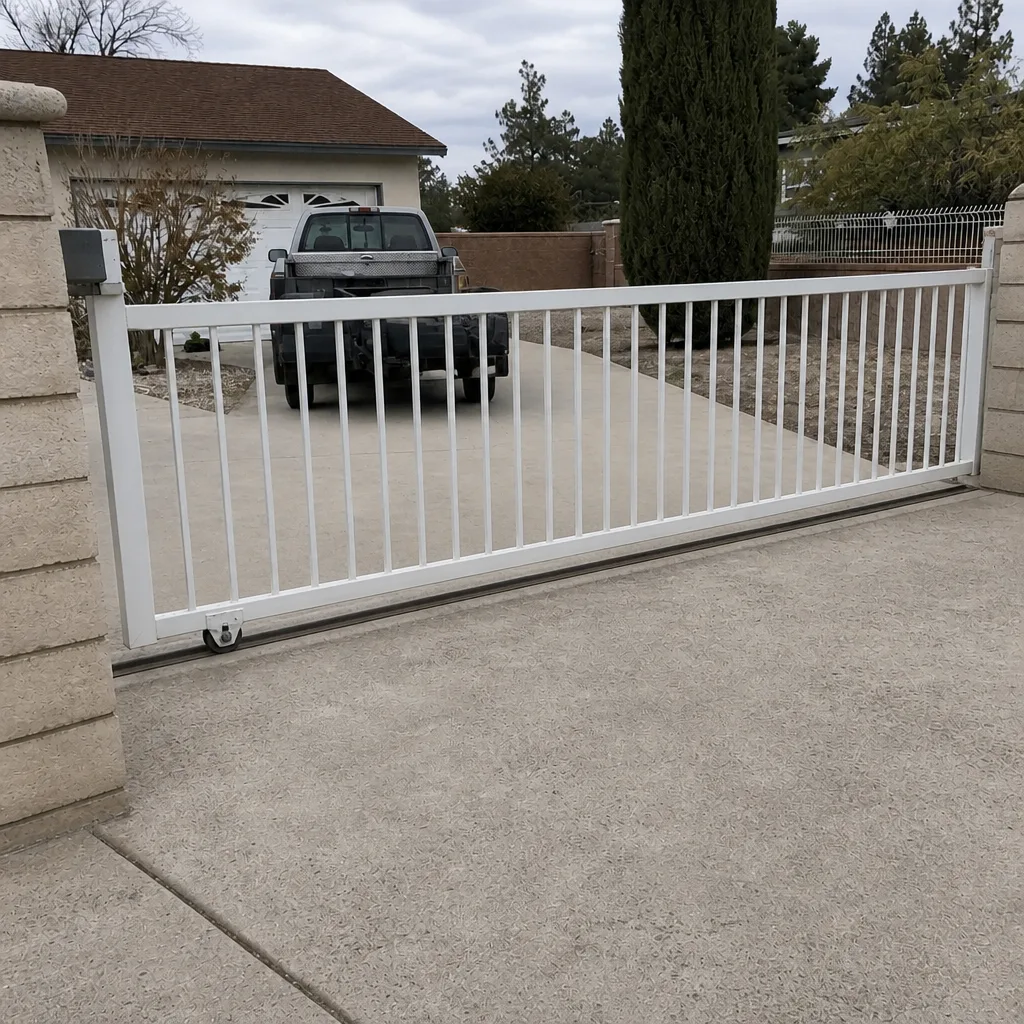 After
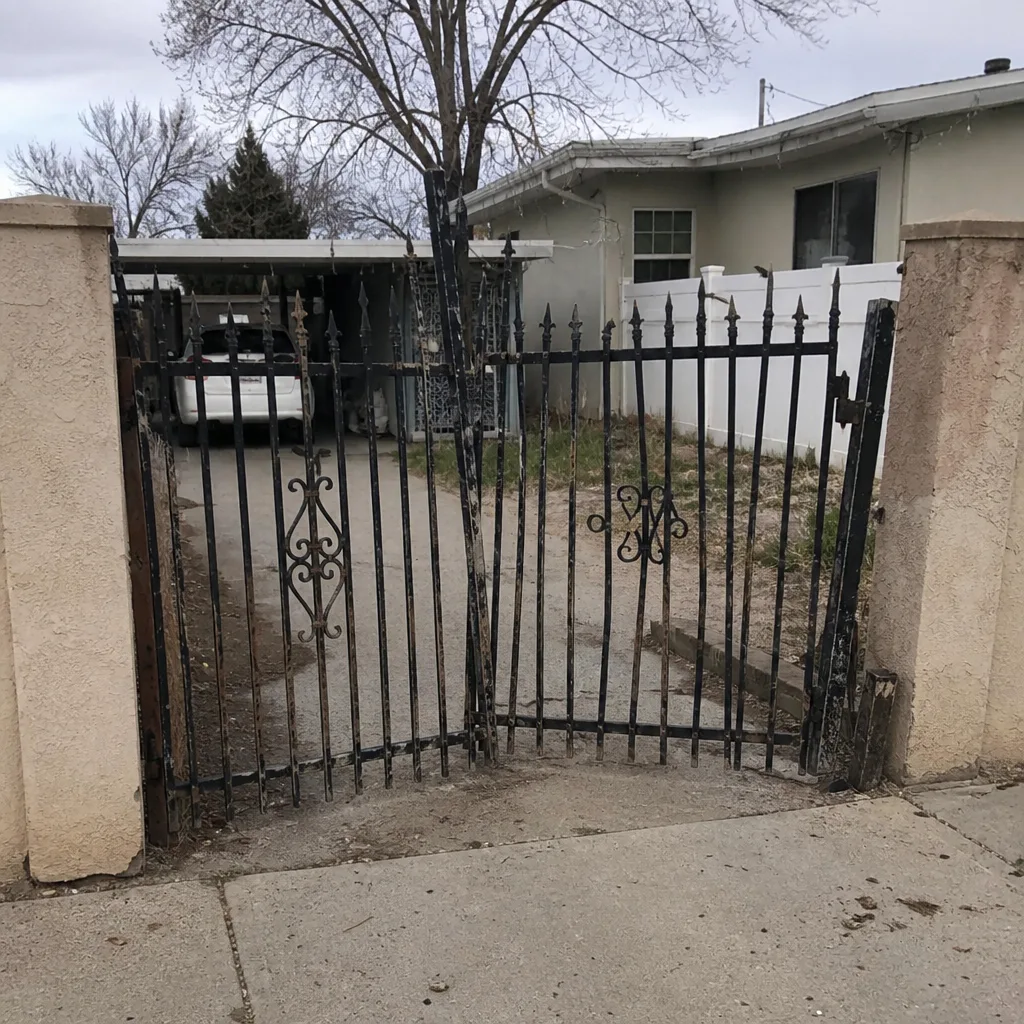 Before
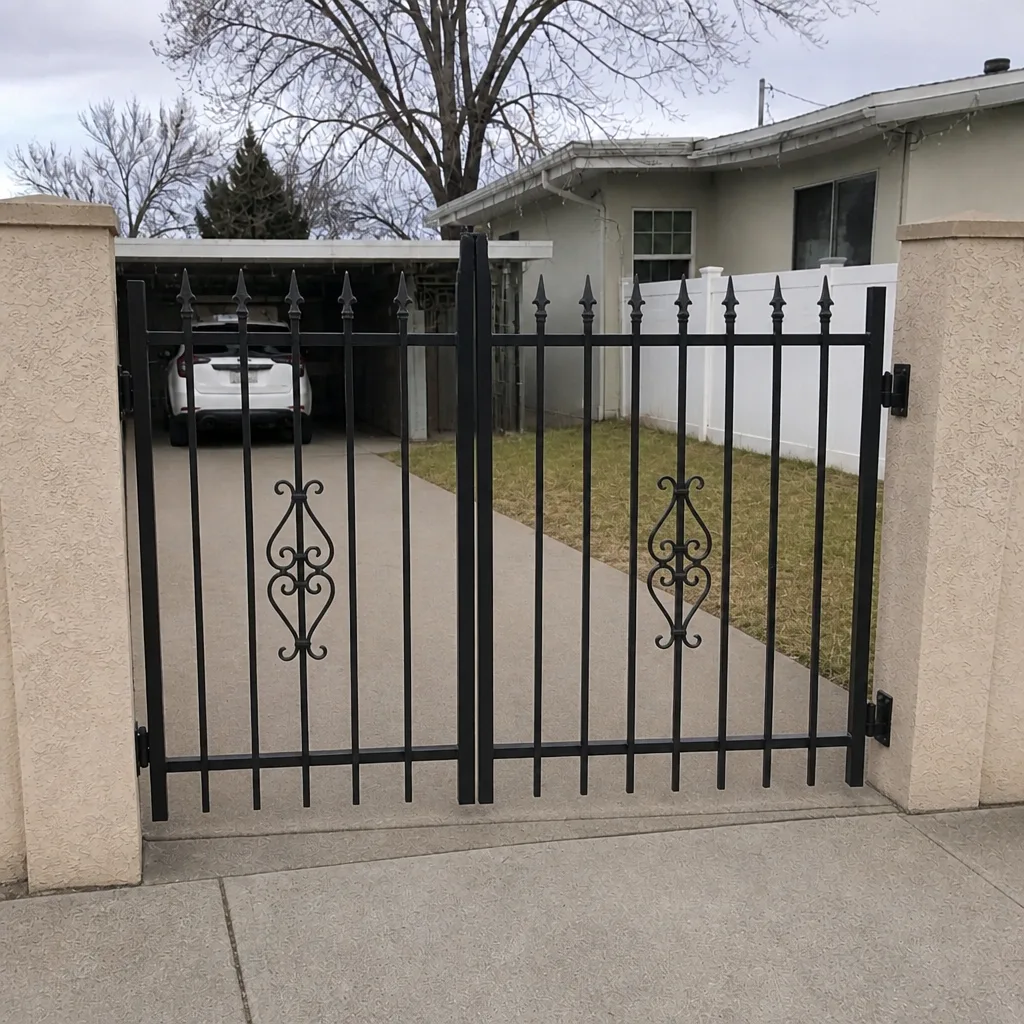 After
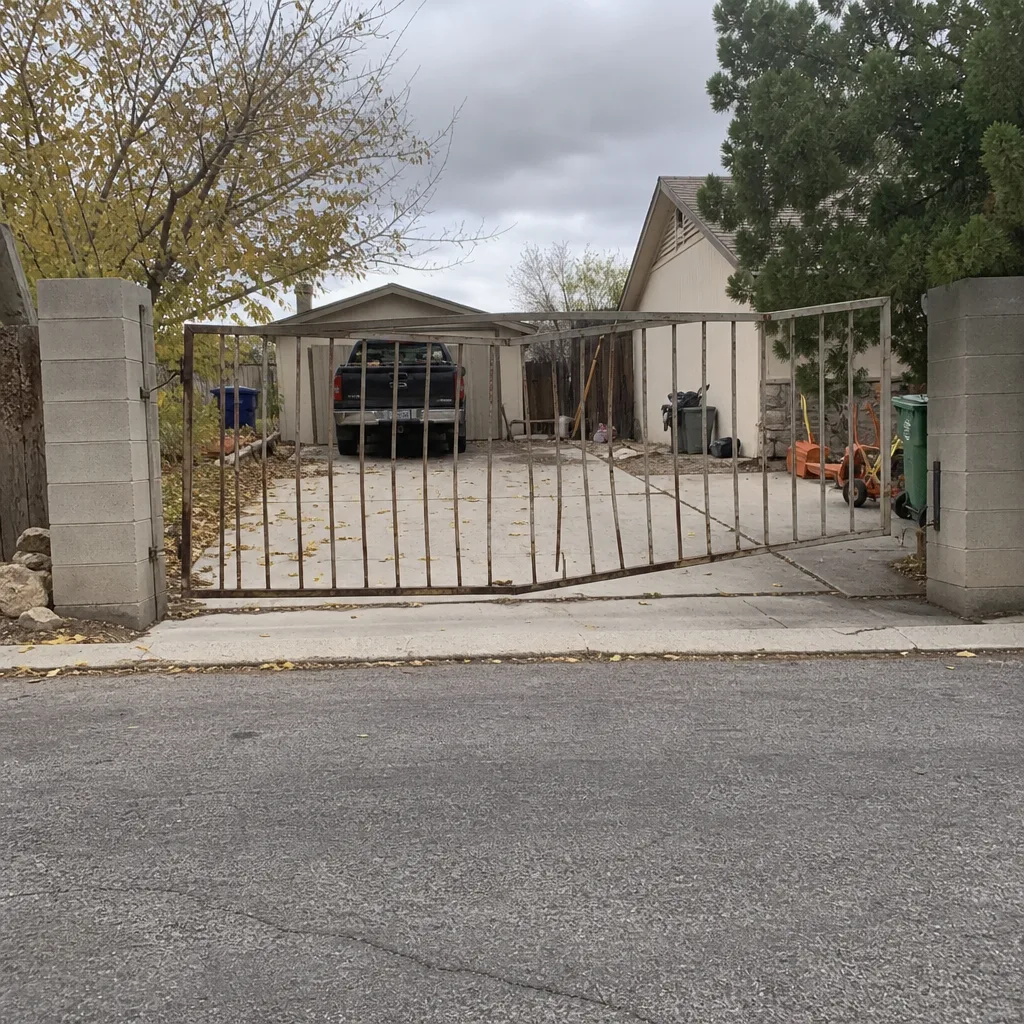 Before
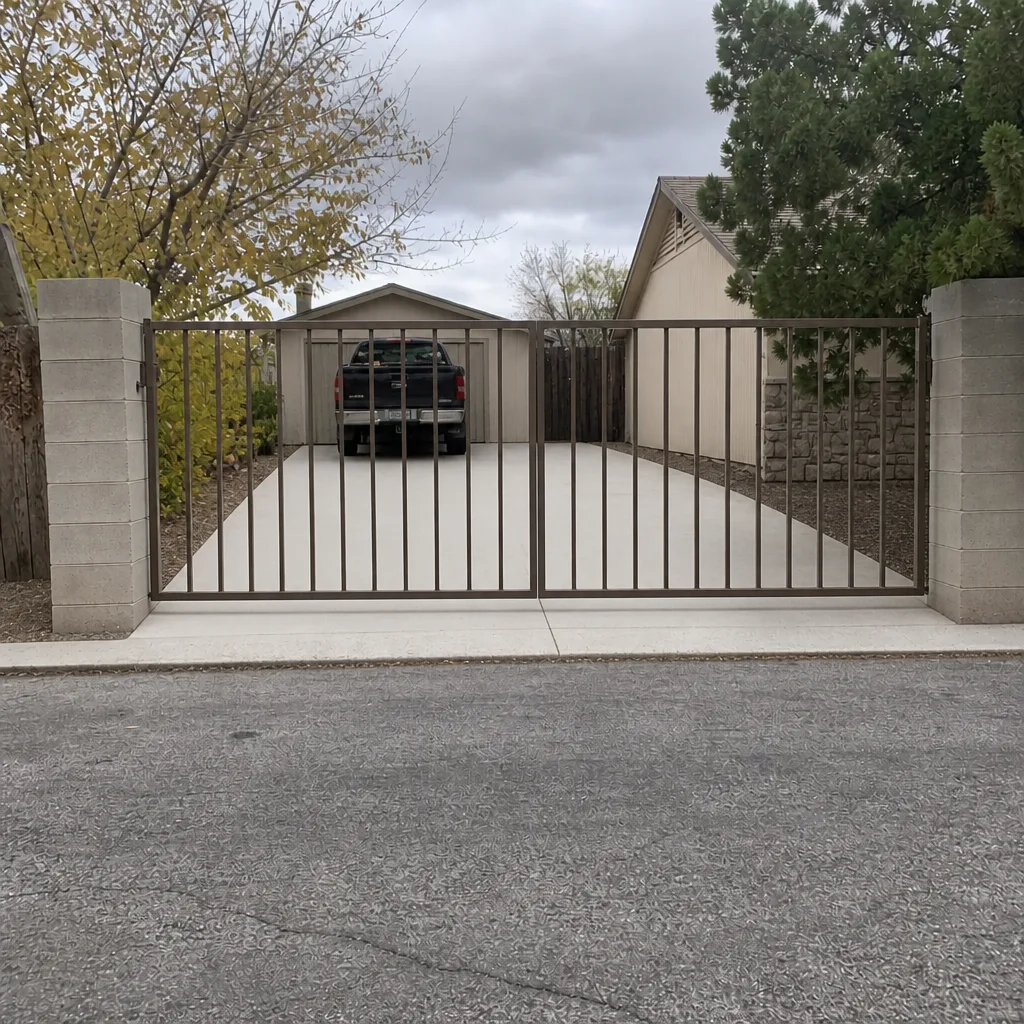 After
When to Call a Professional
Call a professional gate specialist when the repair touches a tension spring or a torsion assembly, when it involves 120-volt wiring or the operator’s power supply, when a heavy gate panel needs to be removed or re-hung, or when the safety reverse and sensor system is involved and you can’t verify it functions correctly. Also call when the operator is a commercial-grade unit like a FAAC or BFT system, when the gate is shared with an HOA or multi-unit property, or when a DIY repair has made the problem worse rather than better. For a full lookup of what a repair call covers, the gate repair service page explains the diagnostic approach.
Gate Repair Spring Valley offers free estimates in Spring Valley – call (844) 420-8518. We answer 24/7. Fast dispatch from 7am to 7pm, Sunday through Friday, and we’re closed Saturday.
Frequently Asked Questions
No. A torsion or high-tension spring stores enormous force, and an improper DIY replacement can cause serious injury or death. It’s one of the few repairs that is professional-only, full stop. Call (844) 420-8518 for an estimate – estimates are free.
Cleaning the track, lubricating hinges and rollers, tightening visible bolts, replacing a remote battery, and adjusting a limit switch documented in your manual are all DIY-safe. Anything involving springs, line voltage, heavy panels, or safety reverse verification should be handled by a specialist. Call (844) 420-8518 to book a diagnostic if you’re unsure which category your problem is in.
Not automatically, but it can complicate a claim if an injury occurs and the insurer determines a safety device was bypassed or improperly repaired. Keeping documentation of any professional inspection is the best protection. Call (844) 420-8518 for a free estimate on safety-layer repairs.
UL 325 is the safety standard for automated gate operators, and yes, an automated gate that’s in operation is expected to meet it. The main requirements are photoelectric sensors, edge sensors, and a functioning safety reverse. If your gate is missing any of these, or if a repair has disabled one, the gate is out of compliance and should be serviced. Call (844) 420-8518 for a compliance check.
Yes, and this is the best approach for most homeowners. Handle the low-risk tasks yourself and book a targeted professional inspection on the parts you can’t safely assess. You get the savings of DIY without taking on hidden liability. For a Spring Valley inspection, call (844) 420-8518 – the estimate is free.
Usually yes. A dead battery or an unpaired remote is a homeowner task, and both Mighty Mule and LiftMaster document the pairing procedure in their manuals. If a fresh battery and a re-pair don’t fix it, the receiver may be failing, which is worth a professional look. Call (844) 420-8518 to schedule a diagnostic if the remote still won’t work after re-pairing.
The Bottom Line
DIY-vs-professional gate repair isn’t a budget decision or a test of nerve. It’s a categorization decision, and the three-category framework in this guide (DIY-safe, DIY-risky, professional-only) will sort most Spring Valley gate problems in a few minutes. Handle the low-risk tasks yourself with the right tools and a manual. Skip the borderline tasks unless you’re prepared to verify the safety system afterwards. And for anything involving springs, line voltage, heavy panels, or safety reverse, bring in a specialist who works on your brand. That’s the honest boundary, and holding the line there is what keeps the DIY savings from turning into a repair bill or a liability claim.
If you’re in Spring Valley and you’re not sure which category your gate problem belongs to, that’s a conversation we’re happy to have. Electric gate repair and manual gate repair are both within our lane, and if you’re weighing a repair against a new install, a specialist can tell you which side of that line you’re on too. For more on the neighborhood and what to expect from a Spring Valley company, see our Spring Valley page. Call (844) 420-8518 for a free estimate. We answer 24/7. Fast dispatch from 7am to 7pm, Sunday through Friday, closed Saturday.
Written by the team at Gate Repair Spring Valley.